How To Install Wall Cladding Panels
Overview of How To Install Wall Cladding Panels
Installing heavy split face stone cladding panels requires absolute structural precision to handle vertical dead loads safely. Genuine natural stone slips carry massive structural weight compared to flimsy plastic replicas. Standard thin-set mortars or uncalibrated masonry backings will fail under this constant shear stress over time. To ensure a permanent bond, you must prepare a rigid, unyielding concrete blockwork substrate. Applying a specialised, high-strength polymer-modified tile adhesive handles vertical mass and outdoor temperature changes flawlessly. This masterclass approach transforms bare masonry into a crisp, distinctly premium architectural feature wall.
Successful vertical stone installation hinges on evaluating background stability and bond chemistry meticulously on site. Rigid 600×150 stone cladding layers cannot tolerate structural wall flexing or moisture movement without debonding. You must calibrate your levels cleanly from the floor line upward using vertical plumbing strings. Sealing porous masonry backing zones with an SBR bonding slurry stops the wall from stealing moisture from your adhesive bed. Let us review the exact technical steps needed to secure an interlocking Z-panel matrix permanently.
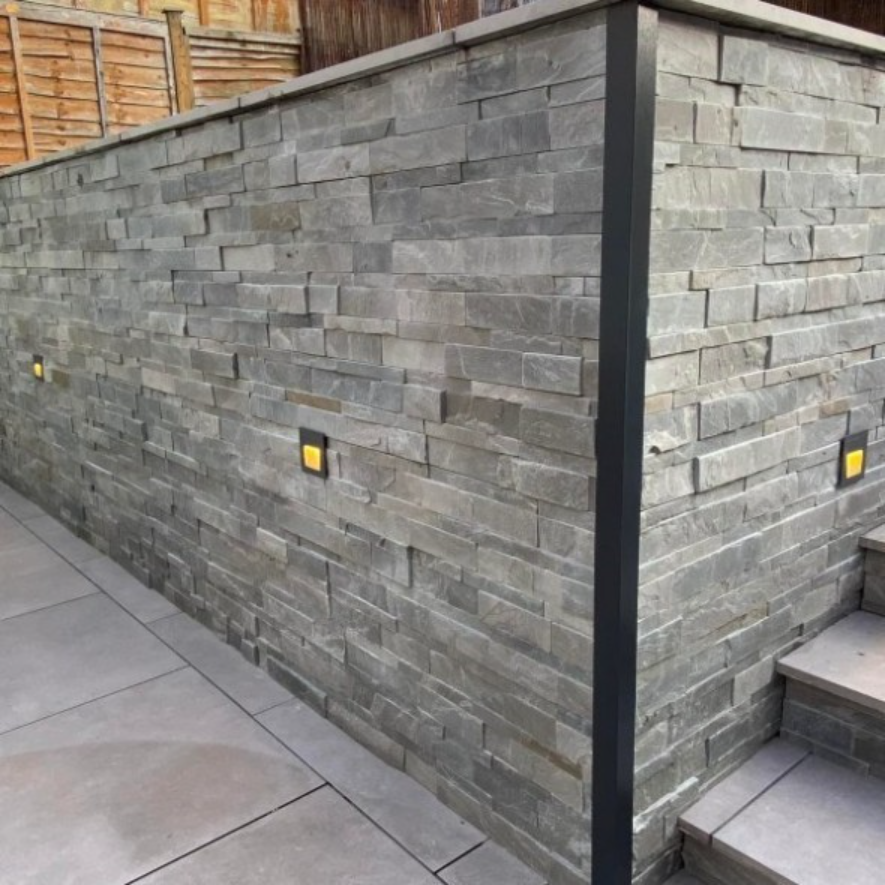
Table of Contents
Choosing the Best Wall Cladding
In order to proceed with the installation process, you first need to select the Natural Wall Cladding that you would like to use. The choice is yours.
- Size Options:
600×150 Cladding Panels
517×163 Cladding Panels - Colour Options:
Black Slate
Tikal Grey
London Grey
Tikal White
Alabama Graphite
Jack Multi Slate
Kandla Grey
Alabama Nature - Best Seller: The most popular Natural Wall Cladding is from our 600×150 Kandla Grey Wall Cladding
Planning
Never grab your notched trowel or open a box of stone slips without measuring your levels first. Mark out the exact square meterage of your chosen 600×150 stone cladding panel layout footprint. You must verify the maximum weight-bearing limit of your target wall before ordering full pallets. Unrendered concrete blockwork can support a heavy stone dead load up to 40kg per square metre easily. Standard plasterboard backing matrices fail rapidly under heavy stone tiles, risking complete structural shear failure on site. Plan your linear layout row heights carefully from the floor level upward. Ensure any perimeter trim pieces or top edge cuts measure at least half a full panel depth.
Site Preparation
Scrape all loose mortar dabs, dirt film, and flaky paint from the concrete backing structure completely. The vertical masonry face must be structurally sound, dry, and flat to within 3mm over a two-metre run. Repair any deep hollow pockets or open blockwork gaps using a high-strength sand and cement rendering mix. Allow fresh render coats to cure undisturbed for at least fourteen days before applying heavy stone panels. Brush a high-performance, polymer-modified SBR bonding slurry across the raw concrete face to seal the porous background blocks. This chemical barrier prevents the masonry wall from sucking moisture out of your tile adhesive too quickly.
Materials
Sourcing premium structural bonding elements is absolutely critical when dealing with interlocking heavy natural stone slips. You require:
- Premium split face stone cladding panels
- High-performance, cement-based polymer-modified flexible tile adhesive
- Specialist polymer-modified SBR structural bonding primers
- High-density standard grey concrete slabs for structural copings
- Calibrated steel mechanical wall ties for high-level runs
- Specialist clear breathable impregnating stone sealer fluids
Tools
Professional stone installation tools ensure mechanical precision and completely clean joint seams. Your site kit must include:
- A heavy-duty electric water-fed saw fitted with a diamond stone blade
- A long structural spirit level and vertical plumb lines
- An electric paddle mixer drill and clean mixing tubs
- A 10mm deep-notched steel adhesive placement trowel
- A stiff masonry wire brush and soft sponge cleaning kit
- A non-marking rubber mallet for tapping stone faces home
- A steel tape measure and chalk string lines
Step-by-Step Installations
Step 1: Determine Placement
Establish your starting line and snap accurate chalk guidelines across the concrete blockwork face. Verify your vertical alignments thoroughly using plumb lines to keep the upcoming linear layout completely true.

Step 2: Clearing Away
Clear away any projecting mortar dabs, structural debris, or flaky paint from the wall footings manually. The solid masonry base must be completely clear of organic matter to prevent vertical load shifting later.

Step 3: Level the Foundation
Fix a perfectly level timber batten rail along the base of your wall using structural masonry screws. This temporary ledge provides absolute horizontal level control, preventing the heavy bottom stone slips from sliding downward.
Step 4: Making and Applying the Foundation Base
Mix your high-performance, cement-based polymer tile adhesive inside a clean tub until a thick paste forms. Apply a generous bed of this flexible adhesive base directly to the wall face using your 10mm deep-notched trowel.

Step 5: Fill the empty Squares
Comb the adhesive bed evenly in horizontal lines to eliminate hollow air pockets across the blockwork structure. Ensure no blank backing spaces remain, creating a completely uniform contact layer across the vertical target area.
Step 6: Preparing the Slabs
Select your interlocking 600×150 wall cladding pieces and brush the rear faces clean of dust. Inspect the structural Z-shaped edges closely to ensure no transit damage blocks a perfectly flush interlocking fit.
Step 7: Mortar Preparation
Back-butter the reverse side of every single natural stone panel tile right before pressing it home. This thin adhesive coating ensures full chemical contact between the dense stone core and the combed wall face.
Step 8: Laying the Sandstone Paving Slabs
Press the stone panel firmly against the combed adhesive bed with a gentle twisting mechanical motion. Tap the rugged face lightly using your non-marking rubber mallet until it sits flush against your layout lines.
Step 9: Jointing the Paving Slabs
Interlock the Z-shaped tile edges tightly together, checking that no visible gaps expose the gray adhesive behind. Stagger every vertical tile seam by exactly half a panel width to form a classic running bond layout.
Step 10: Allow Setting Time
Wipe away any accidental adhesive spots from the clean stone surface texture immediately using a damp sponge. Leave the completed vertical split face masonry layout to cure undisturbed for at least 24 hours.
Pointing
Genuine natural split-face stone panels are engineered to be installed as a tight dry-joint matrix. They do not utilise traditional wet cement joint pointing or flexible silicon grouts between individual interlocking pieces. The precision Z-cut edge profiles mesh together seamlessly to block weather penetration to the base adhesive behind. For finishing the open perimeter lines where your stone slips meet your smooth concrete patio flags, check gaps. Apply a bead of clear, flexible external polymer mastic seal around the outer borders to keep moisture out.
Finishing Tips
Allow the fully completed stone Feature wall layout to cure undisturbed for at least 24 hours. Coat the entire dry split-face stone face thoroughly using a premium, clear breathable impregnating stone sealer fluid. This liquid barrier shields the porous black slate wall cladding from aggressive moss, lichen, and algae growth. It enhances the deep natural colour tones of the stone layers beautifully when daylight hits the wall.
Never use aggressive high-pressure wash nozzles closer than 400mm to the un-grouted stone slip face. Secure a weather-proof natural stone or concrete coping stone directly over the top row of cladding panels. This protecting top lip sheets rainfall away from the vertical tiles, preventing water from trickling behind your adhesive.
How To Install Wall Cladding Panels (FAQs)
Can I install heavy natural stone cladding panels directly onto a timber fence?
No. Timber fences flex heavily under wind pressure and warp continuously from moisture, causing the rigid polymer adhesive to snap. Stone panels must be fixed to structurally solid masonry like concrete blockwork, brick, or rendered walls.
Do split face stone cladding panels require traditional grout?
No. Genuine 600×150 stone cladding panels feature tightly interlocking Z-shaped edges designed specifically to be dry-jointed without grout. Adding grout into the rugged split face texture will ruin the traditional stone appearance completely.
What is the maximum height limit for installing stone cladding slips safely?
Using standard high-strength polymer adhesive methods, you can install panels up to three metres high safely. For vertical structures taller than three metres, you must incorporate mechanical stainless steel shelf angles and structural wall ties.
Can I cut natural quartzite stone panels using a standard hand saw?
No. Natural quartz features an exceptionally dense crystalline core that will ruin standard metal teeth instantly. You must use a water-fed electric saw fitted with a high-quality continuous-rim diamond blade to achieve clean cuts.
Why do I need to back-butter the reverse side of the cladding tile?
Back-buttering ensures complete, hundred-percent adhesive coverage across the variable, rugged rear faces of natural stone slips. It completely eliminates hollow air voids that trap water, preventing frost spalling and tile debonding during freezing weather.
Can these stone cladding panels be installed inside indoor showers?
Yes. High-quality slate and quartzite stone panels work brilliantly for indoor wet zones. You must install a certified tanking membrane system directly over your backing blockwork wall before applying the stone adhesive.
Wall Cladding Samples
To check the exact colour tint and face texture before ordering, we offer concrete and natural stone cladding sample pieces. Getting a sample home helps you match the tone against your property brickwork before ordering full crates.
Contact Us
Got technical questions about our vertical manufactured range? Need help calculating your structural blockwork distribution? Our trade desk team is here to help. Call our helpline at 01782 355170 or email your dimensions to sales@pavinguk.co.uk.