How to Build Garden Steps?
Overview of How to Build Garden Steps
Garden steps and edging play a crucial role in landscape design. In all garden designs, steps serve more than just a practical purpose; they enhance the visual appeal of your outdoor space. By introducing levels, steps help you make use of uneven ground in your outdoor space while adding a sense of structure. Whether you are wanting to link sections of your garden or bring some style to a hilly area, steps can improve the landscape. This article will explore the benefits of installing steps, the recommended materials used for construction, and the various choices available to you.
Table of Contents
Planning Your Garden Steps
Finding The Ideal Location
Assessing the Landscape:
In your outdoor space, start by identifying any slopes or uneven areas that require steps – this will help guide the design and placement of the steps, ensuring good functionality and overall appearance.
Considering Accessibility & Convenience:
It’s important to ensure the steps provide easy access to different parts of the garden. Consider how often the steps will be used and who will actually be using the steps. Steps should be wide enough for comfort and to ensure safety. Further, accessibility is crucial, especially for children and the elderly; placing the steps at the correct height will help to achieve good accessibility.
Choosing Materials & Designs
Types of Materials Available:
You can select from a variety of step materials including natural stone like sandstone, limestone and granite; further materials that are more popular include porcelain and concrete. Each material offers unique characteristics, some more durable than others. Matching the step material with your patio choice helps to create a seamless flow and more professional looking finish. It’s important to choose materials that suit the garden’s overall design, taking into consideration the weather conditions as some materials are more weather resistant and durable than others; choose wisely.
Aesthetic & Functional Design Choices:
It’s important to determine your garden design before selecting your steps. Consider the colour and texture of the materials used to help complement the rest of your outdoor space.
Calculating Step Dimensions & Layout
Determining the Rise & Run:
Calculate the rise (height) and run (depth) of each step. A comfortable rise is typically around 150mm, with a run of at least 300mm. Accurate measurements ensure safe and comfortable steps adding to increased accessibility mentioned above in this article. You must ensure you use a spirit level to maintain even heights and angles throughout the construction/installation process.
Planning the layout for Safety & Comfort:
You should plan the layout of your steps to ensure safety. Some safety features, such as handrails, may be necessary on steeper inclines – this is especially important to consider if the main user of the steps is elderly as they will sometimes require more support or the user has general mobility issues.
Constructing Your Garden Steps: A Step-by-Step Guide
Step 1) Site Preparation & Excavation
Clearing the Area:
You should begin by removing any obstacles from the chosen area; clearing away any plants, rocks, and debris to create a clean and safe working space. It’s important to ensure the area is free of roots and other materials that might interfere with construction, creating hazards. A clear site provides a solid foundation for your garden steps and edging.
Excavating to the Required Depth:
Use a shovel to dig down to the necessary depth for your steps. You should measure carefully to maintain consistency in depth across the entire area. The depth should accommodate the foundation and the height of each step. Accurate excavation ensures stability and safety for the completed steps.
TOP TIP
To ensure accuracy, its recommended to measure the depth twice; as once you start the installation process, if this measurement is wrong, it can impact the overall duration of the project.

Step 2) Building the Foundation & Installing Steps
Laying the Foundation:
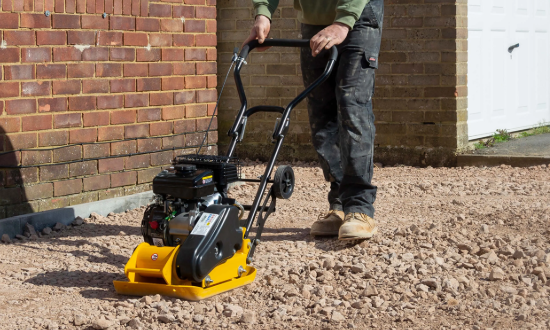
You can create a stable base by laying a layer of hardcore or gravel. Compact the material using a tamper or plate compactor. This foundation supports the weight of the steps and prevents shifting over time. A well-laid foundation is vitally important for the longevity of garden steps and edging.
Securely Installing the Steps:
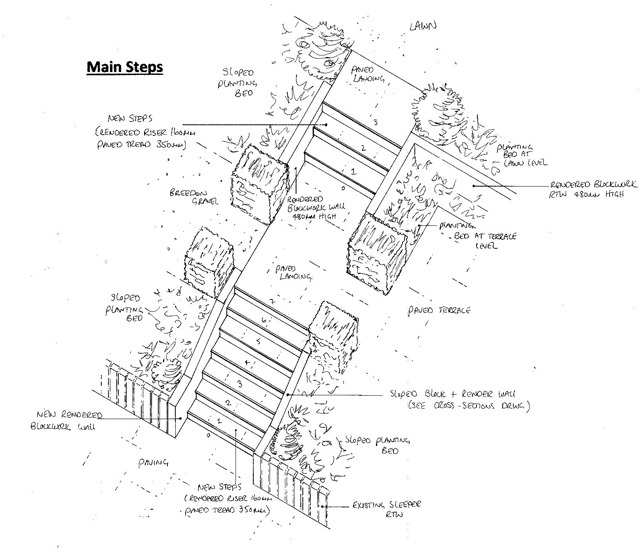
This is an important stage to ensure the prolonged duration of your steps and edging. You should position the first riser at the bottom of the slope than use a spirit level to ensure it sits evenly. Now, apply mortar to secure each step in place, as you progress up the slope. Secure installation guarantees the steps remain safe and functional for years to come.
TOP TIP
Don’t forget to check alignment and levelness regularly as you progress up the slope to ensure a professional finish.
Step 3) Adding Finishing Touches & Ongoing Maintenance
Sealing & Protecting the Steps:
To ensure a prolonged finish, apply a sealant to protect the surface of the steps from weather damage. You should choose a sealing solution that’s suitable for the material being used for the steps, some sealants are suitable for a variety of materials and others are material specific. As a whole, sealing improves the durability and maintains the appearance of the steps. Regular sealing prolongs the life of your garden steps and edging.
Regular Maintenance Tips:
It’s important to look over your outdoor steps regularly for signs of wear or damage. To prolong its lifespan, clean the surface to remove dirt and algae before applying any sealant products. Address any loose or cracked materials promptly to ensure no further cracking occurs – this is especially important before the winter months as frost can crack steps & edging. It’s advised to commit to regular maintenance as this keeps the steps safe and visually appealing for many years to come.

Ensuring Safety & Durability (All Weather Conditions)
Outdoor steps and edging face various weather challenges throughout the year, especially here in the UK. Weatherproofing techniques will help maintain the appearance and functionality of your steps and edging.
Weatherproofing Techniques
- Sealant Application:
Apply a high-quality material specific sealant to protect the surface of your steps. This prevents moisture penetration, which can cause cracks and erosion especially in the winter months. Choose a sealant that suits the material of your steps, whether you have used paving slabs or timber.Sealers are created to suit specific materials, like our professional grade EASYSeal Natural Stone Sealer & Protector suitable for concrete and all natural stone products, including sandstone,
granite and limestone. For porcelain sealing requirements, we recommend our Nexus Pre-Grout Stone & Porcelain Paving Sealer, suitable for both natural stone and porcelain paving slabs. For black limestone paving, we offer a specific Back To Black Limestone Sealer, designed to bring your faded limestone paving back to its original colour. - Drainage Solutions:
It’s important to ensure good drainage around your steps by installing drainage channels or gravel beds to direct water away from the steps. This prevents water from gathering, that can lead to slippery surfaces and structural damage. - Material Selection:
Its recommended to select more durable materials like concrete or stone that withstand harsh weather conditions and constant foot traffic. - Regular Maintenance:
It’s important to look over your steps and edging to identify any signs of wear or damage. Clean the steps to remove dirt and algae, which can make surfaces slippery and unsafe.
Safety Features To Consider
Safety should remain a top priority when constructing outdoor garden steps.
- Non-Slip Surfaces: Use materials with textured finishes to provide grip, some non-slip treatments can be applied to existing steps to enhance safety. This is especially important in wet or icy conditions as the risk factor of slipping increases significantly.
- Handrails: Install handrails on steeper inclines to offer support and stability. Handrails provide additional security, particularly for children and the elderly or anyone suffering with mobility issues.
- Adequate Lighting: This is an important safety feature and one that we highly recommend. Ensure the steps are well-lit, especially in outdoor areas used during evening hours. Solar-powered lights or low-voltage LED lights can illuminate the path, reducing the risk of trips and accidents.
By implementing these weatherproofing techniques and safety features, you can create garden steps that remain functional and attractive in all weather conditions.

Additional Related Articles
How To Cut Paving Slabs? Step-By-Step Guide
How To Lay Patio Slabs? Step-By-Step Guide
Top 10 Garden Patio Designs & Ideas
Frequently Asked Questions
What materials work best for garden steps?
Garden steps can use various materials like brick, concrete, stone, or timber; each material offers unique benefits compared to the other. Brick provides a classic look, whereas concrete ensures durability. Stone blends with natural surroundings and timber adds warmth and character – the choice is yours.
How do you calculate the dimensions of garden steps?
Calculate the rise (height) and run (depth) for each step. A comfortable rise measures around 150mm. The run should be at least 300mm. Use a spirit level to ensure even heights and angles. Consistent measurements prevent tripping hazards.
What is the best way to ensure safety on garden steps?
Safety features enhance garden steps. Use non-slip surfaces for grip and install handrails on steep inclines. Ensure adequate lighting for visibility while maintaining consistent step dimensions for smooth transitions.
How long does it take to install garden steps?
Installation time varies based on complexity and materials. Simple steps may take a day or two and more intricate designs require additional time. Proper planning and preparation can definitely speed up the process.
Troubleshooting Common Issues
Steps feel unstable or wobbly. What should you do?
Check the foundation for stability, ensure you compact the base material thoroughly. Secure each step with mortar for added durability and longevity. Now use a spirit level to ensure alignment is correct with no wobbly steps that move, any movement and you will need to repeat the installation process. Regular inspections help identify potential issues early so you can act on this and prevent additional, more costly damage from occurring.
Water pools on steps after rain. How can you fix this?
If this keeps happening after heavy rainfall, it need addressing; you should ensure proper drainage around the steps by installing drainage channels or gravel beds to soak up excess water. It’s important to direct water away from steps to prevent pooling to begin with, any water pooling can have major impacts on the lifespan of the steps.
Steps show signs of wear or cracking. How do you address this?
Repair cracks with a suitable filler or simply replace the damaged materials promptly – you may need to simply replace one step which can sometimes be the better option. You can apply sealants to protect the steps surface however this is required to be done yearly which can become a hassle.
Steps become slippery in wet conditions. What solutions exist?
If this is the case, you may decide to use materials with textured finishes for additional grip. Apply non-slip treatments to existing steps and ensure proper drainage to prevent water accumulation. We recommended adequate lighting as this highly improves visibility in wet conditions.