How To Lay Limestone Paving
Overview of How To Lay Limestone Paving
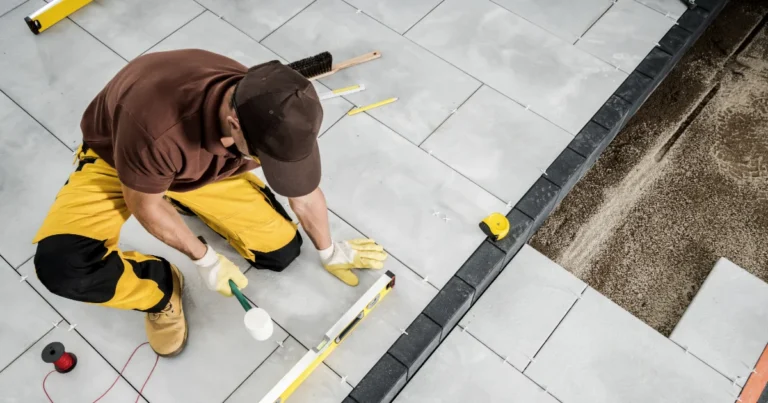
Installing natural limestone paving flags requires absolute dimensional precision and careful handling of dense sedimentary rock structures. Premium limestone slabs possess a tightly uniform crystalline density, meaning they lack the major riven height variations found in standard sandstones. This flat surface profile simplifies level control significantly, making it an excellent trade choice for sleek garden pathways and modern household terraces. However, a successful build demands full structural mortar bed coverage. Proper physical support prevents individual slabs from rocking, tilting, or collecting moisture underneath across your exterior project space.
Laying a long-lasting limestone patio hinges on evaluating chemical surface boundaries and sub-base stability on site. Rigid Kota Blue limestone layers cannot tolerate sub-base flexing or soil movement without suffering immediate structural joint failure. You must also paint the reverse side of every slab with a high-bond priming slurry to lock it to the mortar bed permanently. Let us walk through the exact professional trade methods needed to manage deep ground excavation, mortar bedding, and resin jointing compounds.

Table of Contents
Choosing the Best Limestone
In order to proceed with the installation process, you first need to select the Natural Limestone paving that you would like to use. Choose from our Hand-Split Limestone or Honed Limestone in a variety of colour and size options. The choice is yours.
- Size Options:
600×150 Paving
900×300 Paving
900×600 Paving - Colour Options:
Black Limestone
Grey Limestone
Kota Blue Limestone
Yellow Limestone
Best Seller: The most popular Natural Limestone is from our Kota Blue limestone.
Planning
Never guess your levels or start mixing mortar without a fully scaled site drawing. Mark out the exact square meterage of your chosen limestone paving layout footprint. You must factor in a consistent joint width of exactly 5mm to 10mm between slabs. Calculate your fall requirements carefully to prevent standing surface water issues across the final texture. A minimum cross-fall drainage slope of 1:60 is the industry trade standard for solid stone patio structures. This ensures winter rainfall sheets cleanly away from your residential building foundations. Always plan layout cuts so perimeter fragments never measure less than a third of a full flag width.
Site Preparation
Excavate your target patio floor footprint down to a uniform depth of at least 150mm. Remove all soft topsoil, organic root matter, and loose clay debris from the sub-grade layer completely. Compact the raw sub-grade earth thoroughly using a heavy mechanical plate compactor tool. Lay down a minimum 100mm thickness of granular MOT Type 1 sub-base aggregate materials across the project space. Compact this stone aggregate layer in two separate 50mm stages to achieve maximum density. This forms an unyielding foundation that resists seasonal ground movement without sinking or shifting.
Materials
Sourcing the correct structural compound materials is critical when dealing with natural stone units. You require:
- Premium Kota Blue limestone flags or blue slate slabs
- Granular MOT Type 1 sub-base aggregate fills
- Sharp washing sand (do not use soft building sand)
- High-grade British Portland cement compounds
- Specialist polymer-modified SBR structural priming slurry
- High-flow exterior resin jointing compounds or porcelain grout
Tools
Professional stone tools ensure mechanical precision and clean edge profiles. Your site kit must include:
- A heavy-duty petrol saw fitted with a diamond stone blade
- A mechanical plate compactor (wacker plate)
- A forced-action mortar mixer or heavy mixing tub
- A long structural spirit level and layout string lines
- A standard mortar placement trowel
- A heavy rubber stone mallet for setting flag heights
- A soft tile sponge and washboy cleaning kit
Step-by-Step Installations
Step 1: Determine Paving Placement
Set up your structural string lines across the patio footprint to establish exact finished paving heights. Check your drainage falls meticulously against the lines to ensure rainwater flows cleanly away from the building.
Step 2: Digging the foundation
Excavate the target ground floor footprint down to a uniform depth of at least 150mm total. Remove all soft organic topsoil, loose roots, and clay debris to prepare the sub-grade layer completely.
Step 3: Level the Foundation
Rake and level the sub-grade earth before running a mechanical plate compactor over the bare ground floor. Lay down a 100mm layer of granular MOT Type 1 aggregate and compact it into an unyielding foundation.
Step 4: Making and Applying the Foundation Base
Mix your semi-dry bedding mortar using a strict 4:1 ratio of sharp washing sand to Portland cement. The compound material must hold its shape like a firm snowball when squeezed lightly in your hand.
Step 5: Fill the empty Squares
Spread the semi-dry mortar mix fully across your compacted aggregate sub-base at a uniform thickness of 40mm. Never use spot-bedding mortar dabs, or the limestone paving flags will rock and split under vehicle loads.
Step 6: Preparing the Slabs
Select your natural Kota Blue limestone flags from multiple crates at once to mix natural tonal variations. Brush the rear face of each block to remove loose dust particles before applying chemical compounds.
Step 7: Mortar Preparation
Mix your polymer-modified SBR priming slurry to a smooth, creamy paste texture inside a clean plastic bucket. Paint this bonding slurry completely across the back of the dense sedimentary stone right before laying.
Step 8: Laying the Sandstone Paving Slabs
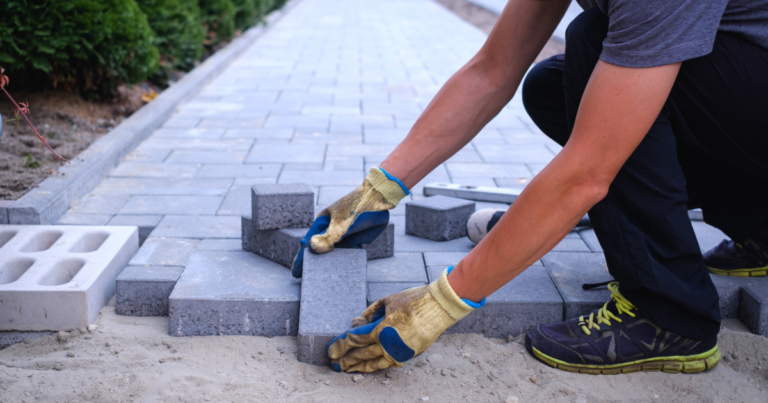
Lower the primed limestone slab gently onto the full, solid sand and cement mortar bed framework. Tap the flag face firmly using your heavy rubber mallet until it sits flush against your layout string line.
Step 9: Jointing the Paving Slabs
Check every single flagstone edge immediately using a long spirit level to guarantee a perfectly flat surface matrix. Maintain a consistent, exact joint gap width of 5mm to 10mm between the interlocking paving stones.
Step 10: Allow Setting Time
Wipe away any accidental priming slurry spills from the clean tile surface texture immediately using a damp sponge. Leave the completed natural stone layout to cure undisturbed for at least 48 hours before pointing.
Pointing
Allow your laid limestone patio layout to cure undisturbed for at least 48 hours before walking on it. Clean out any loose mortar debris from the tile joint gaps using a stiff brush. Wet the entire limestone stone surface thoroughly using clean garden hose water. Soak the paving joints fully.
Sweep a specialist high-flow resin jointing compound or high-strength cement grout deeply into the open gaps. Work the compound diagonally across the tiles to fill the entire joint depth completely. Strike the filled joints cleanly using a curved iron iron-pointing tool to achieve a dense, flush profile.
Finishing Tips
Clean the entire completed patio face thoroughly using a damp tile sponge before the jointing resin sets hard. Always wipe diagonally across the joint lines to avoid dragging compound material out of the gaps. Never use high-pressure washers closer than 300mm to fresh grout lines, or you will dislodge the jointing sand matrix.
If your layout borders a lawn floor, install a hidden concrete haunching curb along the outer perimeter edge. This structural lip holds the rigid mortar bed tightly together, preventing external flag movement over the seasons.
How To Lay Limestone Paving (FAQs)
Can I lay limestone slabs directly onto garden soil or sand?
No. Limestone flags are heavy and require solid foundation support. They require an unyielding MOT Type 1 foundation and a full 4:1 cement mortar bed to prevent cracking under weight.
Is a priming slurry layer necessary for natural limestone paving flags?
Yes. While limestone is porous, a polymer SBR priming slurry coat ensures a permanent mechanical bond. It prevents the dry stone from sucking moisture out of the mortar mix too quickly.
What is the ideal joint width for natural limestone patio slabs?
You must leave a consistent joint width of exactly 5mm to 10mm between flags. Never butt-joint outdoor limestone slabs tightly together, because natural thermal expansion will cause the stone edges to chip and fracture.
Can I cut limestone paving slabs using a standard hand saw?
No. Natural limestone features a highly dense crystalline core that is exceptionally hard-wearing. You must use a high-speed petrol saw fitted with a high-quality diamond blade to achieve clean cuts.
Do Kota Blue limestone flags fade over time in the sun?
Yes. Natural dark limestone is sensitive to direct UV sunlight. Intense sun exposure will gradually mellow deep tones into an elegant slate grey shade over several seasons.
Why is spot bedding forbidden for natural limestone patio slabs?
Spot bedding leaves empty void cavities underneath the paving stones. These spaces collect water during winter rainfall, causing frost spalling and tile cracking under foot pressure during freezing weather.
Limestone Paving Samples
To check the exact colour tint and face texture before ordering, we offer concrete and natural stone paving sample pieces. Getting a sample home helps you match the tone against your property brickwork before ordering full pallets.
Contact Us
Got technical questions about our natural stone range? Need help calculating your block pallet distribution? Our trade desk team is here to help. Call our helpline at 01782 355170 or email your dimensions to sales@pavinguk.co.uk.